
- Edge of Screen Borders: Yes
- Squad UI borders: No
- Audio Cues: Limited
- Vocal Lines: Yes
- Chat Lines: Match Vocal
- Special Action Key: No
- Environment Zone Intensity (setting): Any
- Hide Ally Visual Effects (setting): Any
This information is intended to compliment the Temple of Febe Strike Guide with suggestions and settings that may make it easier for some members of the community to participate in the content. It is not repeating all of the information, so please use both documents together.
It contains false colour images to highlight mechanics. Images more faithful to game rendering may be found in the original guide.
Before You Start
Game settings suggestionsOur base line suggested settings before these modifications can be found here
Instance Specific Visual Issues
At 10% HP, after the breakbar, Cerus performs a repeating attack until 0% HP.
This attack has a prominent full screen effect with high contrast every 5 seconds.
As this is the only mechanic occuring in this phase, if needed and your build allows, it is possible to look away or close your eyes.
- Some mechanics may be difficult to see with similarity to the floor colour.
- If you need less contrast to assist in seeing mechanics turn post-processing to low.
General Build Options
- Bring some extra CC skills
- Handy to have, but not essential for Normal Mode is Projectile Destruction skills such as Protective Solace, Barrier Signet, Sanctuary.
- If playing low intensity, consider a shadowstep/teleport to aid positioning.
- Ranged cleaving attacks can help with Malice Shadows.
Gameplay Guide Additions
It helps to generally know where the facets spawn. If you can't remember them all, in priority keep track of where Gluttony, Envy, and Rage are relative to your position when close to phase.
The rose window marks north.
Don't pick on the little guy! In split phases, the Empowered Facet of Cerus will be notably larger.
While the order of the attacks in split phase is random, the first will almost always be Insatiable Hunger (orbs) from Gluttony.
Regret
Crushing Regret (green)Cerus Version
This doesn't have a voice cue. The boss animation is gesturing upwards three times; then the attack hits as a fist is slammed into the ground. Make sure the green circle is in a safe place between any pools on the floor from Despair.
Mitigate the damage before it hits with Protection, Barrier and Aegis.
Extra Visual Assistance
- Watch for the green arrows for the location, but don't rely on them to indicate player numbers in a circle.
Embodiment of Regret Version
Standard guide advice applies. Watch out for players with movement impeding conditions and move to them to stack.
Despair
Wail of Despair (orange/spread)Cerus Version
Don't try and stack these if it has not been agreed upon, and you have good reflexes or a block skill. Take them far enough off the boss that there is space to rotate around for the wall mechanic. Dodge toward the boss so you don't have to walk through the Pool of Despair as the group returns to melee range on the boss.
When experienced, try not to drop them to the west where Gluttony spawns to make collecting the orbs easier if they haven't despawned.
Extra Audio Assistance
Voiced lines:
- You will suffocate.
- (groans)
Embodiment of Despair Version
- When Empowered, be sure to drop these towards the edge not centre or south of Despair that will be needed to stand on next if heading to Embodiment of Malice.
- If Envy attacks, step backwards (NW) towards the wall. At 360 range from Despair this will be out of range of the wall attack.
Envy
Envious Gaze (wall)Cerus Version
This attack visually is a wall rotating anti-clockwise 360 degrees around the boss. There are a couple of options on how to handle it, depending on timing and skill.
- Step left of the indicator at spawn, then back slightly right after the wall.
- Evade through the wall.
- Evade through the hitbox of the boss. Hitbox size is indicated by the red circle in the image above.
- Rotate around the boss matching the wall.
Be prepared to cleanse conditions after the wall.
Extra Audio Assistance
Voiced lines:
- Run... Run...
- Do not look away.


Embodiment of Envy Version
When not Empowered watch for the attack to side step or Evade. Keeping the group stacked if possible will make the attack more predictable in location.
Empowered Envious Gaze needs to be reacted to quickly. There are two walls, one is standard in the direction of the player the Embodiment of Envy chose to face, and the other starts at 180 degrees. The additional wall travels at twice the speed of the original attack, which often means there is no time to use Evade twice.
Close to the boss there are options - the easiest being rotate in front of the main wall. This will be clear of the second wall as well. If a lower intensity option is needed, like the standard wall this can be Evaded. If you can step left of the first wall, dodge left through the fast wall and then treat it as the unempowered version. If starting to the right of the first wall aim for around 1/6th to 2/6ths of a rotation in front of the main wall then dodge through the hitbox before it touches. Then rotate around the last section or evade back through as the wall has done half a rotation.
A more timing lenient alternative to Evade is to use a teleport skill through the wall.
Malice
Malicious Intent (shadow/clone)Cerus Version
Malice shadows should be spawned away Cerus, but in most experienced groups this will only need to be about half way to the wall. If newer players are attempting this, use extra distance to buy more time.
If ranged DPS with cleave stand in the hitbox of the boss as you target the Malice shadow, except when the Envy wall is active.
- Above 50% HP the wall will be 4 mechanics timing until stepping out of hitbox again. It will be simple to track as the Despair orange spread is before the Envy (wall) in the sequence.
- Under 50% HP it is a bit more dangerous in the hitbox. The next mechanics will be Despair orange spread, Regret stack green then Envy (wall).
- The Malice Shadows are susceptible to Chill, Cripple and Immobilize. If close to phase it is possible to just delay the Shadow/s instead of killing them as they vanish on phase.
Extra Audio Assistance
Voiced lines:
- To me, return...
- I hunger for power...
A shadow dying may sound like a player death.
Extra Visual Assistance (for the target)
- Hazy edge of screen border with slanting diagonal lines
- Hazy tether to the boss
- Below Cerus health bar screen text, Cerus is drawing out your malice.
- Overhead filling target reticule
Embodiment of Malice Version
If the Embodiment of Malice is not Empowered drop the shadow closer to the wall or near the Embodiment of Regret to make it walk further. Chill, Cripple and Immobilize the shadow and proceed to kill the intended targets if DPS permits.
If Empowered in the split phase focus Malice but watch Envy. If the squad stacks on the wall side of Malice in line with Envy it can make dodging Envious Gaze (wall) easier. Treat the shadows as usual.
Gluttony
Insatiable Hunger (orbs)Cerus Version and Embodiment of Gluttony Version are treated the same.
Walk into the path of the orbs to body block them before they reach the destination. It can help to think of a plate on the boss side of the orb. Only touching that exposed surface will collect them.
Either body block or projectile destruct the small projectiles which can resemble intermittently bright needles.
Typically, for Embodiment of Gluttony a player with good mobility will go and collect the orbs. If mechanics overlap and the person collecting is chosen, priority goes to Crushing Regret (green).
Extra Audio Assistance
Voiced lines:
- Come to me...
- I feed...
- (laughs)
Rage
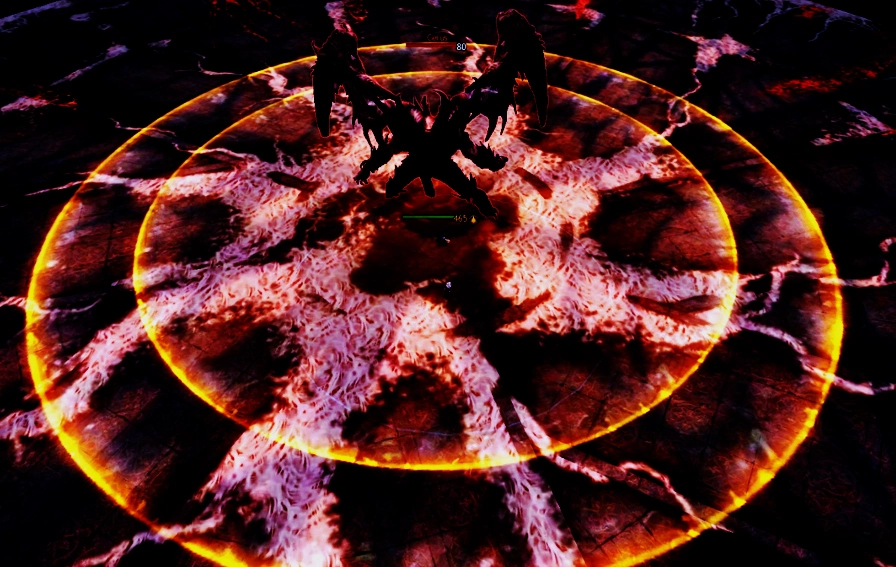
Cry of Rage (large circle)Cerus Version
This attack when not Empowered is easy to dodge when watching the filling circle. This can't always be called for you by someone else as the two examples below show the difference ping can play on dodge timing. Consider not using animation locking skills once the filling circle appears.
Extra Audio Assistance
Voiced lines:
- Back!
- (screams)
 (False Colour) Example of visuals for dodge timing at 30 ping.
 (False Colour) Example of visuals for dodge timing at 250 ping.
Embodiment of Rage Version
When Rage is Empowered the circle becomes larger and undodgeable. If moving over from Envy, make sure the attack at Rage has not started as you move across. If the attack starts when at Rage, Swiftness or Superspeed help to escape the AOE.